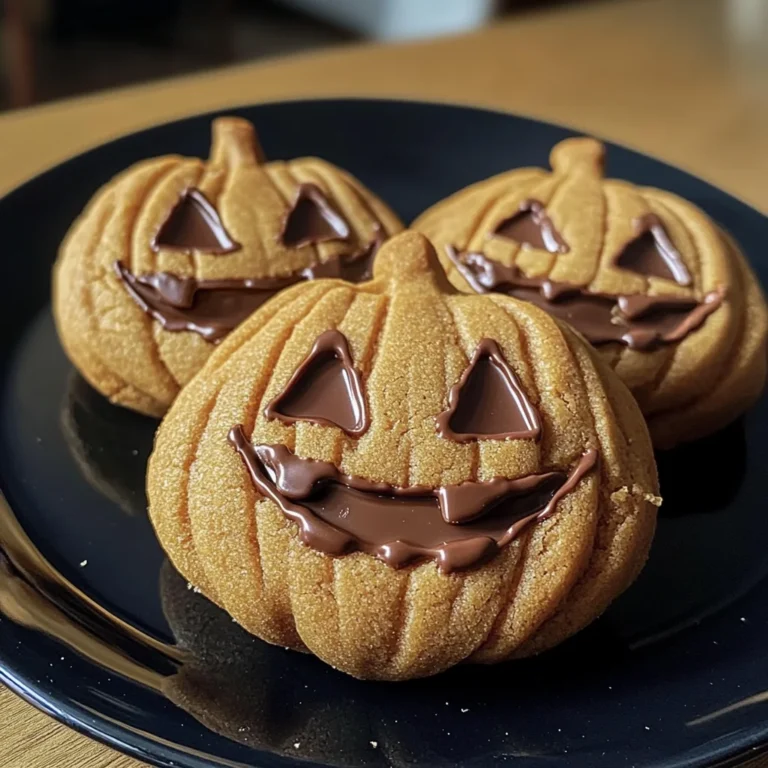
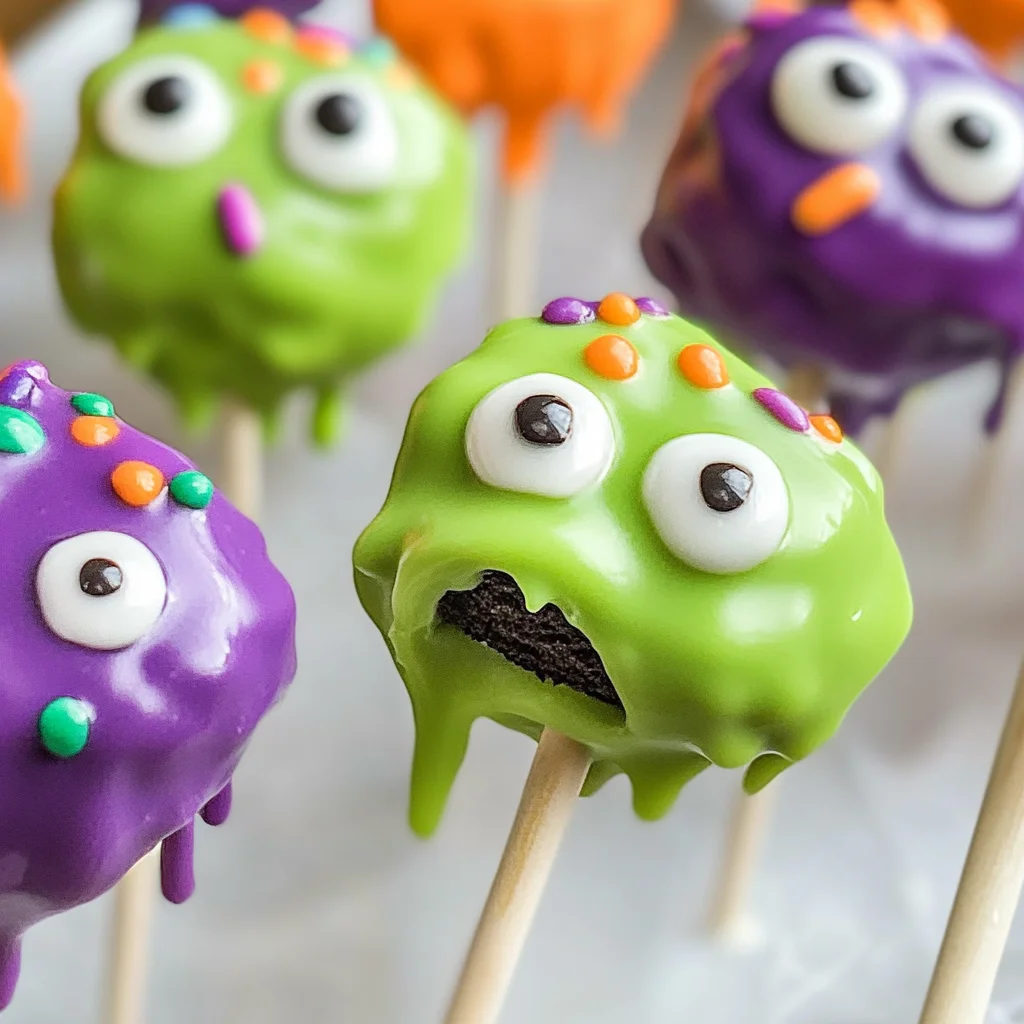
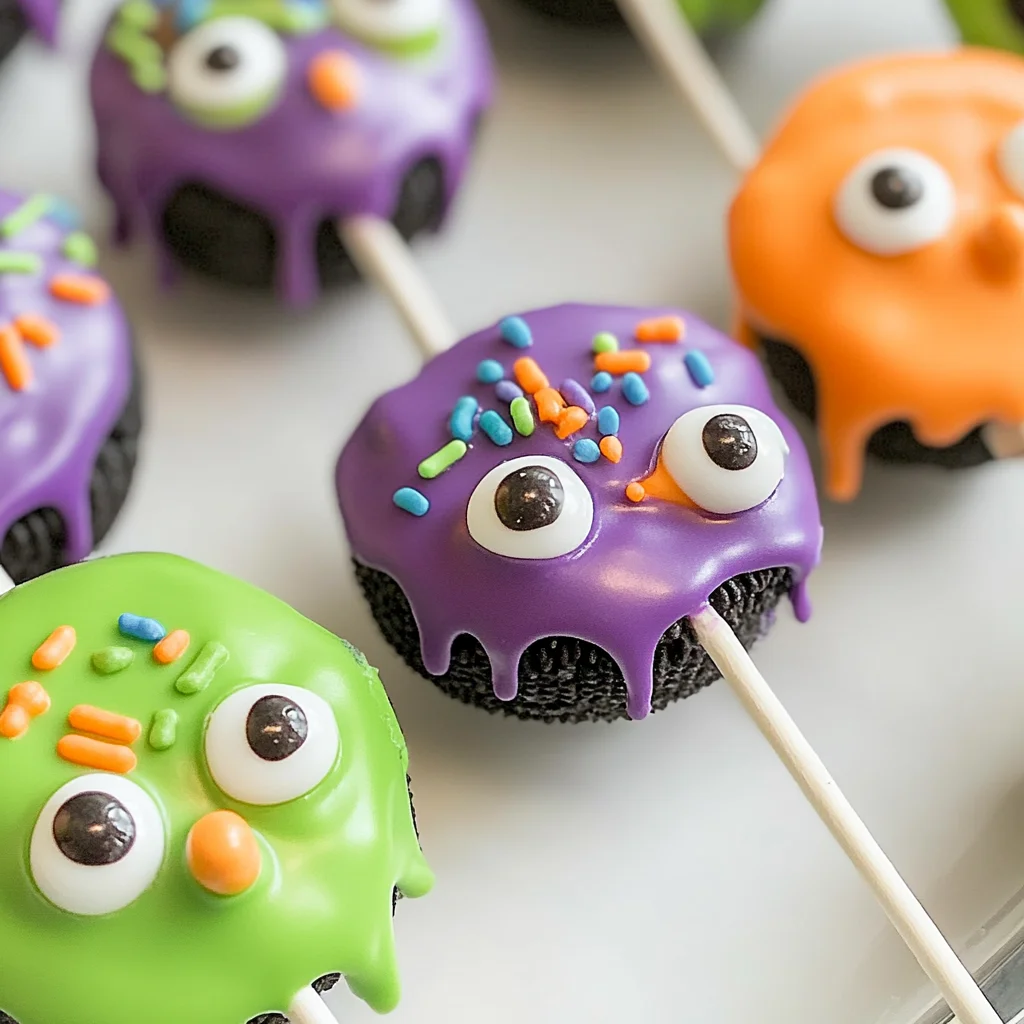
Monster Oreo Pops
If you’re looking for a delightfully spooky treat that will have both kids and adults smiling, you’ve come to the right place! These Monster Oreo Pops are not only fun to make but also a fantastic way to bring everyone together for some Halloween cheer. I love how simple they are—no baking required! They make for perfect party favors, a creative addition to your Halloween spread, or just a sweet surprise for your family after dinner.
What makes these pops truly special is the joy of decorating them. Each one can be an individual masterpiece with colorful candy melts and playful candy eyes, making it a fun activity for all ages. Plus, they’re so delicious that you’ll want to keep this recipe handy year-round!
Why You’ll Love This Recipe
- Easy to Make: These Monster Oreo Pops require no baking and minimal prep time, making them perfect for busy days.
- Family-Friendly Fun: Kids will love helping out in the kitchen, especially when it comes to decorating their own monster creations!
- Customizable: You can mix and match colors and decorations based on what you have at home or your favorite candies.
- Party Hit: Whether it’s a Halloween party or a casual get-together, these pops are sure to impress your guests and spark joy.
- Deliciously Sweet: With creamy Oreos coated in colorful candy melts, each bite is a delightful treat that satisfies any sweet tooth.
Ingredients You’ll Need
Let’s gather our simple, wholesome ingredients for these adorable Monster Oreo Pops! You’ll find everything you need at your local grocery store, and I promise the end result will be worth every minute spent in the kitchen.
For the Monster Pops
- 24 Double Stuffed Oreos
- ½ cup white chocolate melting wafers
- 12 ounces green candy melts
- 12 ounces purple candy melts
- 12 ounces orange candy melts
- 3 Tablespoons Crisco shortening (divided)
- Green, purple, and orange jimmy sprinkles (long not round)
- Candy eyes (multiple sizes)
- 24 Cake pop sticks
Variations
One of the best things about these Monster Oreo Pops is their flexibility! Feel free to get creative with flavors and colors. Here are some fun ideas:
- Change the Oreos: Swap out Double Stuffed Oreos for any flavored Oreos you love—think mint or peanut butter!
- Colorful Melts: Use different colors of candy melts depending on the season or occasion; pastel colors work great for spring!
- Decorate Differently: Instead of using sprinkles and candy eyes, consider adding edible glitter or using chocolate drizzle for a new look.
- Add Flavoring: Mix in some extracts like vanilla or almond with your melting wafers for an extra flavor kick!
How to Make Monster Oreo Pops
Step 1: Prepare the Cake Pop Sticks
Start by taking each cake pop stick and gently poking a hole about ½ inch deep into the Oreo filling. It’s important to do this carefully so you don’t break the wafer. Just create enough space for the stick without leaving it inside. This step ensures that your pops stay intact when dipped!
Step 2: Melt the White Chocolate
Next up, add your white chocolate melting wafers to a small microwave-safe bowl. Heat them on 50% power for 1 minute. Stir well, then return them to the microwave in 30-second bursts until they’re silky smooth. The melted chocolate acts as glue so we can secure our sticks properly.
Step 3: Attach the Sticks
Dip about ½ inch of each cake pop stick into the melted chocolate before inserting it back into each Oreo. This helps hold everything together while they cool down. Once they’re all done, leave them resting until that chocolate hardens.
Step 4: Melt Your Colored Candy Wafers
Now it’s time for color! Add your colored melting wafers into small microwave-safe containers (glass tumblers work wonders!). Heat as before—1 minute on 50% power—then stir in a tablespoon of Crisco shortening to create that velvety consistency we want. Return to the microwave until smooth.
Step 5: Dip Those Oreos
Carefully dip each Oreo into your colored melted candy deep enough to cover them entirely. You might need to wiggle them side-to-side a bit as you dip! Let any excess chocolate drip off before moving onto decorating.
Step 6: Decorate Your Monsters
While the chocolate is still wet, sprinkle on some colorful jimmies and add those cute candy eyes! Get creative with how you arrange them; there’s no wrong way when it comes to monster designs.
Step 7: Chill Before Serving
Finally, allow your Monster Pops to rest upright in a cake pop stand or even a piece of styrofoam inside your refrigerator for about 30 minutes. This helps everything set perfectly before serving!
And there you have it! Your delicious and delightful Monster Oreo Pops are ready to wow everyone at your next celebration! Enjoy every bite—these little monsters are sure to bring smiles all around.
Pro Tips for Making Monster Oreo Pops
Creating these delightful Monster Oreo Pops is a breeze, and with a few handy tips, you’ll ensure they turn out perfectly every time!
-
Use Room Temperature Ingredients: Allow your ingredients to come to room temperature before starting. This helps the melting chocolate and candy melts combine more smoothly, resulting in better coverage for your pops.
-
Don’t Rush the Melting Process: Heat the chocolate and candy melts slowly in the microwave. This prevents burning and ensures a silky smooth consistency that’s easy to dip into.
-
Experiment with Designs: Have fun with the placement of your sprinkles and candy eyes! Creating unique designs not only adds character but also makes each pop look exciting and inviting.
-
Keep Your Workspace Clean: Use parchment paper to catch drips and spills. A tidy workspace allows you to focus on crafting your Monster Pops without worrying about messes.
-
Chill Before Serving: Let your finished Monster Oreo Pops chill in the refrigerator for at least 30 minutes. This helps set everything in place and makes them easier to handle when serving.
How to Serve Monster Oreo Pops
Presenting your Monster Oreo Pops can be just as fun as making them! Here are some creative ideas to showcase these vibrant treats at your next gathering.
Garnishes
- Edible Glitter: Sprinkle some edible glitter over your pops for an extra shimmer that catches the light, making them even more festive.
- Colorful Paper Straws: Instead of cake pop sticks, consider using colorful paper straws for a whimsical touch that complements the Halloween theme.
Side Dishes
- Witch’s Brew Punch: A refreshing green or purple fruit punch can be a perfect pairing, adding a thematic drink option that delights both kids and adults alike.
- Veggie Skeleton Platter: Create a fun vegetable platter arranged like a skeleton. The colorful veggies make a healthy contrast to the sweet treats while keeping the party vibe lively.
- Ghostly Fruit Skewers: Assemble skewers with banana ghosts (using chocolate chips for eyes) and orange melon balls. They’re easy to grab and provide a fruity balance to all that sweetness!
- Crispy Baked Sweet Potato Fries: These fries offer a savory contrast that pairs well with sweet treats, making them an ideal side dish for balance at any gathering.
With these serving suggestions, your Monster Oreo Pops will not only taste delicious but also be visually appealing! Enjoy making these treats and sharing them with friends and family this Halloween season!
Make Ahead and Storage
These Monster Oreo Pops are not only fun to make but also perfect for preparing in advance, especially for parties or Halloween gatherings! You can easily store them and enjoy their deliciousness later.
Storing Leftovers
- Store leftover Monster Oreo Pops in an airtight container at room temperature for up to 3 days.
- If you prefer to keep them longer, refrigerate them for up to a week, ensuring they are well sealed to prevent drying out.
Freezing
- To freeze, place the pops in a single layer on a baking sheet and freeze until solid.
- Once frozen, transfer them to a freezer-safe container or bag. They can be frozen for up to 2 months.
- When ready to enjoy, let them thaw in the refrigerator overnight before serving.
Reheating
- There’s no need to reheat these pops as they are best enjoyed chilled or at room temperature.
- If they’ve been frozen, allow them some time outside the refrigerator to regain their original texture before serving.
FAQs
Here are some common questions about making Monster Oreo Pops!
Can I use different types of Oreos for Monster Oreo Pops?
Absolutely! Feel free to experiment with various flavors of Oreos, such as mint or peanut butter, to create unique versions of your Monster Oreo Pops.
How do I make my Monster Oreo Pops look extra spooky?
To enhance the spooky factor of your Monster Oreo Pops, consider adding additional decorations like edible glitter or using different colored melting wafers. Get creative and let your imagination run wild!
What occasions are perfect for serving Monster Oreo Pops?
Monster Oreo Pops are ideal for Halloween parties, school events, or any fun gathering where you want to impress guests with a delightful treat that’s easy to enjoy!
Final Thoughts
I hope you have a blast making these whimsical and colorful Monster Oreo Pops! They’re not just delicious but also a wonderful way to bring some festive cheer into your kitchen. Enjoy crafting these delightful treats with your loved ones and don’t hesitate to get creative with your designs. Happy snacking!

Monster Oreo Pops
- Prep Time: 20 minutes
- Cook Time: 10 minutes
- Total Time: 30 minutes
- Yield: Makes approximately 24 cake pops 1x
- Category: Dessert
- Method: No-bake
- Cuisine: American
Description
If you’re in search of a fun and festive treat to brighten up your gatherings, these Monster Oreo Pops are the perfect choice! Ideal for Halloween or any celebration, these colorful treats require no baking and are an excellent way to involve kids in the kitchen. Each Oreo is transformed into a delightful monster with vibrant candy melts and playful decorations that will make everyone smile. They’re easy to customize, so you can get creative with colors and toppings based on your preferences. Whether you serve them at a party or surprise your family after dinner, these delicious pops will surely delight both kids and adults alike!
Ingredients
- 24 Double Stuffed Oreos
- ½ cup white chocolate melting wafers
- 12 ounces green candy melts
- 12 ounces purple candy melts
- 12 ounces orange candy melts
- 3 tablespoons Crisco shortening (divided)
- Candy eyes (various sizes)
- Green, purple, and orange sprinkles
- 24 Cake pop sticks
Instructions
- Prepare cake pop sticks by gently inserting them into the filling of each Oreo.
- Melt white chocolate wafers in a microwave-safe bowl until smooth. Dip each stick into the melted chocolate before reinserting it into the Oreo.
- Melt colored candy wafers with Crisco shortening until smooth.
- Dip each Oreo into the colored melts, allowing excess to drip off.
- While still wet, decorate with sprinkles and candy eyes.
- Chill the pops in the refrigerator for about 30 minutes to set.
Nutrition
- Serving Size: 1 cake pop (45g)
- Calories: 180
- Sugar: 15g
- Sodium: 45mg
- Fat: 9g
- Saturated Fat: 5g
- Unsaturated Fat: 3g
- Trans Fat: 0g
- Carbohydrates: 25g
- Fiber: 1g
- Protein: 2g
- Cholesterol: 0mg