Halloween Pudding Cups
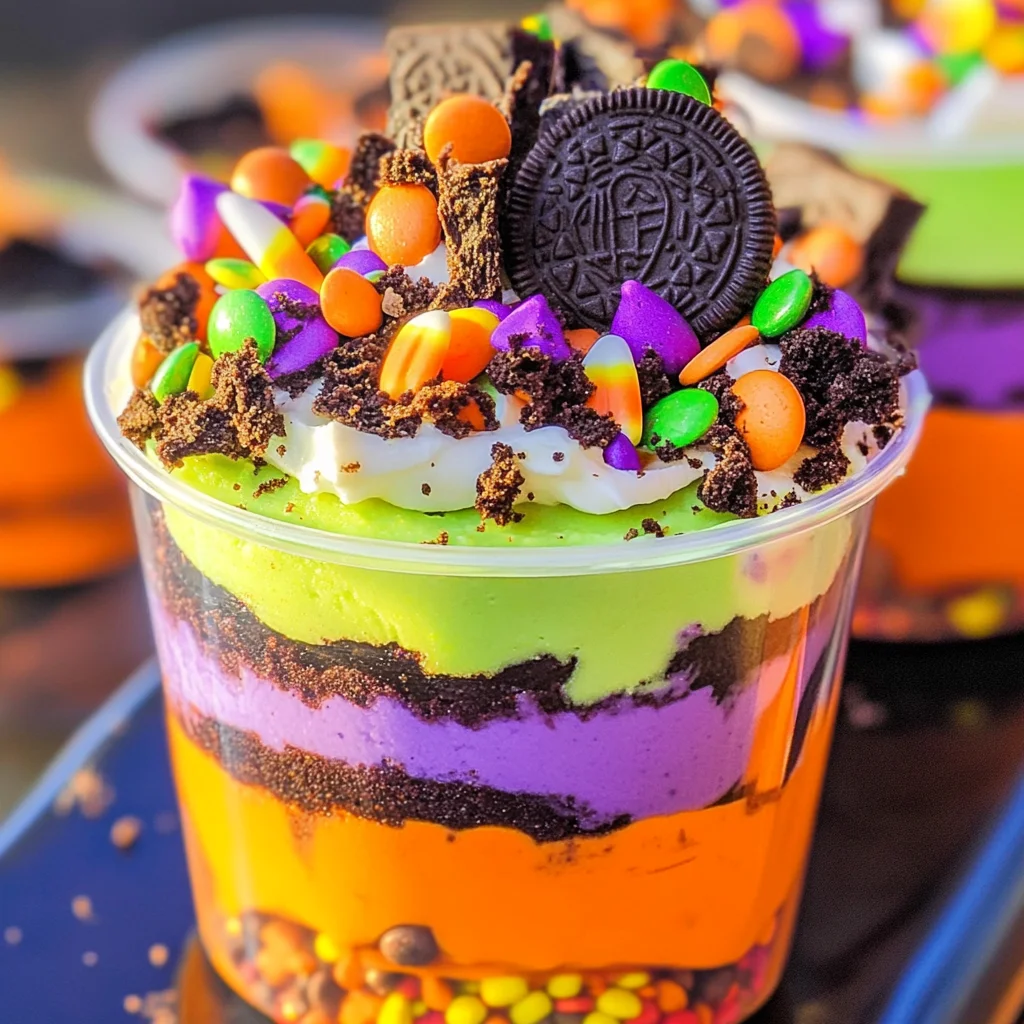
If you’re looking for a delightful treat that brings a smile to everyone’s face, these Halloween Pudding Cups are just the ticket! They are not only incredibly fun to make, but they also bring a festive flair to any gathering. Imagine layers of chocolate cake, creamy pudding, and crushed Oreo cookies, all dressed up in vibrant Halloween colors. It’s a dessert that kids and adults alike will adore!
These cups are perfect for parties, family gatherings, or even just a cozy night in. Plus, they’re simple enough to whip up on busy weeknights when you want something special without too much fuss. Trust me, once you try these Halloween Pudding Cups, they’ll become a favorite in your home.
Why You’ll Love This Recipe
- Easy to Prepare: With simple steps and no complicated techniques, anyone can create this spooky delight.
- Family-Friendly Fun: Kids love helping out with the layering and decorating—it’s a great way to spend time together.
- Make-Ahead Convenience: Prepare them in advance for parties or gatherings; they stay fresh and delicious for days!
- Colorful & Festive: The bright Halloween colors make this dessert visually appealing and exciting for all ages.
- Delicious Layers: The combination of chocolate cake, creamy pudding, and crunchy Oreos makes every bite heavenly.
Ingredients You’ll Need
Making these Halloween Pudding Cups is easy with these simple ingredients. You probably have most of them on hand already! Let’s gather what we need:
For the Cake Layer
- 1 15.25 ounce box devils food cake
- Water (oil and eggs as directed on the box)
For the Pudding Layer
- 2 3.4 ounce boxes white chocolate instant pudding
- 4 cups cold milk
For the Topping
- 8 ounces whipped topping
- Neon green (orange and purple food coloring)
- 1 ½ cups crushed Oreo cookies
- Milano cookies (for decoration)
- Halloween candy and sprinkles (for decor)
- 10 8 ounce clear buckets
Variations
This recipe is wonderfully flexible! Feel free to get creative based on your preferences or what you have at home.
- Use Different Cake Flavors: Swap out the devil’s food cake for another flavor like vanilla or red velvet for a unique twist.
- Try Alternative Puddings: Experiment with chocolate or butterscotch pudding instead of white chocolate for different flavors.
- Add Fruit Layers: Incorporate layers of fruit like strawberries or raspberries between the pudding layers for added freshness.
- Change Up the Toppings: Use different candies or themed decorations based on your personal taste or seasonal themes.
How to Make Halloween Pudding Cups
Step 1: Bake the Cake
Begin by preheating your oven to 350 degrees. Prepare a 9×13 baking dish by greasing it lightly. In a large bowl, mix your cake mix along with water, oil, and eggs as directed on the box. Pour this mixture into your baking dish and bake according to package instructions until fully cooked. Once baked, let it cool completely on a cooling rack. Cooling is key—it ensures our layers don’t melt into one another later!
Step 2: Prepare the Pudding
While your cake cools down, it’s time to tackle the pudding! In another bowl, combine the white chocolate instant pudding with cold milk and whisk until it thickens nicely. This step is crucial because it creates that wonderful creamy layer we all love in our pudding cups.
Step 3: Color the Pudding
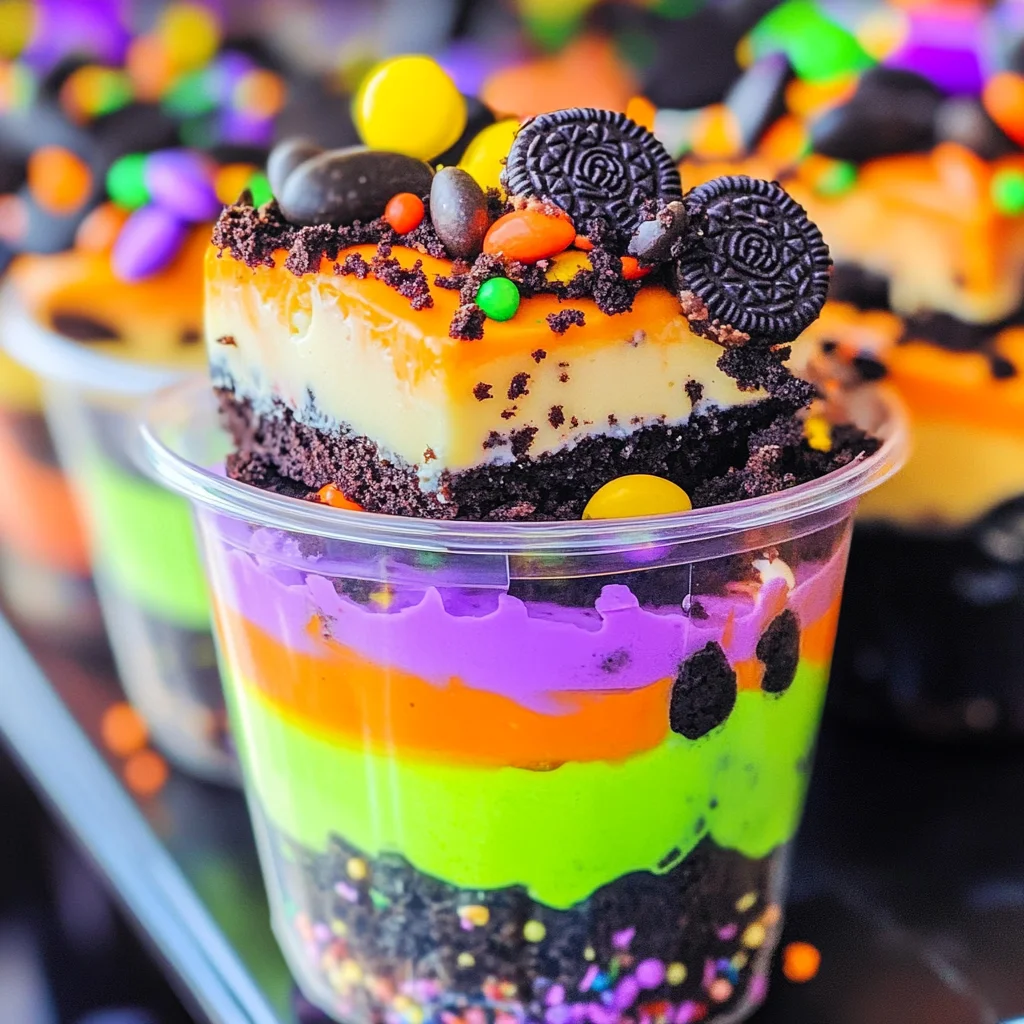
Once thickened, divide your pudding into three bowls. Add food coloring to each bowl—neon green in one, orange in another, and purple in the last—to create bright colors that scream Halloween! The colors not only look fantastic but also excite everyone who gets a cup.
Step 4: Assemble Your Cups
Now comes the fun part! Take your cooled cake and slice it into bite-sized squares. Start layering by placing some cake at the bottom of each clear bucket followed by a layer of colored pudding. Repeat this until you reach the top of each cup.
Step 5: Decorate!
Finish off your Halloween Pudding Cups by adding whipped topping on top and sprinkling with crushed Oreo cookies for that “dirt” effect. Don’t forget to add Milano cookies as decorative tombstones along with some colorful Halloween candy and sprinkles! These cute touches will make your dessert stand out beautifully.
And there you have it—your very own Halloween Pudding Cups ready to impress friends and family alike! Enjoy this sweet treat while creating unforgettable memories together!
Pro Tips for Making Halloween Pudding Cups
Creating delightful Halloween Pudding Cups is easier than you think! Here are some handy tips to ensure your dessert is a spooktacular success.
-
Use high-quality ingredients: Opt for good quality pudding and whipped topping. This ensures a creamier texture and richer flavor, making your dessert more enjoyable.
-
Chill before serving: Allowing the pudding cups to chill in the refrigerator for a few hours helps the flavors meld together and gives the layers a chance to set properly, enhancing both taste and presentation.
-
Mix colors creatively: Don’t be afraid to blend different shades of food coloring to create unique hues. This adds visual interest and can make your dessert even more festive!
-
Layer thoughtfully: When layering the pudding, alternate colors carefully. This creates a beautiful effect that’s appealing to the eye and makes each cup exciting to dig into.
-
Get kids involved: Letting children help crush cookies or mix colors can make this activity fun for the whole family, turning it into a memorable Halloween tradition.
How to Serve Halloween Pudding Cups
Presenting your Halloween Pudding Cups with flair can really elevate their appeal. Here are some creative ideas to serve them at your next gathering!
Garnishes
- Crushed candy corn: Sprinkle a few pieces on top for added crunch and a pop of color.
- Chocolate spider rings: Place these cute decorations on top of each cup to give your dessert an extra spooky touch.
- Edible glitter: A light dusting of edible glitter adds an enchanting sparkle that’s perfect for Halloween festivities.
Side Dishes
- Witch’s Brew Soup: A vibrant green soup made with spinach and peas that pairs well with the sweet elements of the pudding cups.
- Monster Veggie Platter: Offer an assortment of colorful veggies arranged like monsters, served with a tasty dip. It balances out the sweetness beautifully.
- Ghostly Fruit Salad: Use seasonal fruits like oranges, apples, and grapes, cut into ghost shapes or served in eerie formations for a refreshing side.
- Pumpkin Spice Muffins: These muffins bring warmth and spice to your spread, complementing the chocolate pudding cups while keeping within the autumn theme.
With these tips and serving suggestions, your Halloween Pudding Cups will not only look fantastic but will also delight everyone at your celebration! Enjoy creating these delicious treats that celebrate the spirit of Halloween!
Make Ahead and Storage
These Halloween Pudding Cups are not only a delightful treat but also perfect for meal prep! You can make them ahead of time, which is ideal for busy schedules or last-minute parties.
Storing Leftovers
- Store any uneaten pudding cups in an airtight container in the refrigerator.
- They will keep fresh for up to 3 days.
- If you’ve layered the cups, it’s best to consume them within the first couple of days for optimal texture.
Freezing
- Unfortunately, pudding cups do not freeze well due to the texture of the pudding and whipped topping.
- However, you can freeze the cake squares separately and assemble the pudding cups fresh when you’re ready to serve.
Reheating
- Since these are served chilled, there’s no need to reheat.
- Simply remove from the fridge and enjoy as a cool treat!
FAQs
Got questions about making these Halloween Pudding Cups? We’ve got answers!
Can I use different colors for my Halloween Pudding Cups?
Absolutely! Feel free to get creative with your food coloring. You can mix colors or use different shades to match your Halloween theme perfectly.
How do I make Halloween Pudding Cups look more festive?
To make your Halloween Pudding Cups extra special, top them with a variety of Halloween-themed sprinkles, gummy candies, or even little plastic spiders for a spooky touch!
What is the best way to layer my Halloween Pudding Cups?
For beautiful layers, start with a spoonful of cake at the bottom, followed by a layer of colored pudding. Repeat this process until you fill your cup, finishing with whipped topping and decorations on top.
How long do Halloween Pudding Cups last in the fridge?
These delicious treats will stay fresh in your refrigerator for about 3 days if stored properly in an airtight container.
Final Thoughts
I hope you enjoy making these fun and festive Halloween Pudding Cups as much as I do! They’re a wonderful way to celebrate the spooky season with friends and family. With their vibrant colors and delightful flavors, they’re sure to be a hit at any gathering. Don’t hesitate—get in the kitchen and whip up this delicious dessert! Happy baking!
Halloween Pudding Cups
- Prep Time: 30 minutes
- Cook Time: 30 minutes
- Total Time: 1 hour
- Yield: Serves approximately 10 cups 1x
- Category: Dessert
- Method: Baking
- Cuisine: American
Description
Bring joy to your Halloween festivities with these delightful Halloween Pudding Cups! This whimsical dessert combines layers of moist chocolate cake, creamy white chocolate pudding, and crunchy cookie toppings, all dressed in vibrant Halloween colors. Perfect for parties or cozy nights in, these pudding cups are easy to prepare and fun to customize. Kids will love joining in on the layering and decorating, making it a fantastic family activity. With their striking appearance and delicious flavors, these spooky treats will be a hit among guests of all ages!
Ingredients
- 1 box devil's food cake mix
- 4 cups cold milk
- 2 boxes white chocolate instant pudding
- 8 oz whipped topping
- Food coloring (neon green, orange, purple)
- 1 ½ cups crushed Oreo cookies
Instructions
- Preheat the oven to 350°F. Prepare a baking dish and bake the devil's food cake according to package instructions. Let cool completely.
- In a bowl, whisk together the white chocolate pudding mix and cold milk until thickened.
- Divide the pudding into three bowls and add food coloring to create neon green, orange, and purple shades.
- Cut the cooled cake into bite-sized squares. Layer cake pieces and colored pudding in clear cups until filled.
- Top with whipped topping, crushed Oreos, Milano cookies for decoration, and any additional Halloween candies or sprinkles.
Nutrition
- Serving Size: 1 pudding cup (150g)
- Calories: 320
- Sugar: 25g
- Sodium: 250mg
- Fat: 15g
- Saturated Fat: 7g
- Unsaturated Fat: 7g
- Trans Fat: 0g
- Carbohydrates: 45g
- Fiber: 2g
- Protein: 4g
- Cholesterol: 20mg