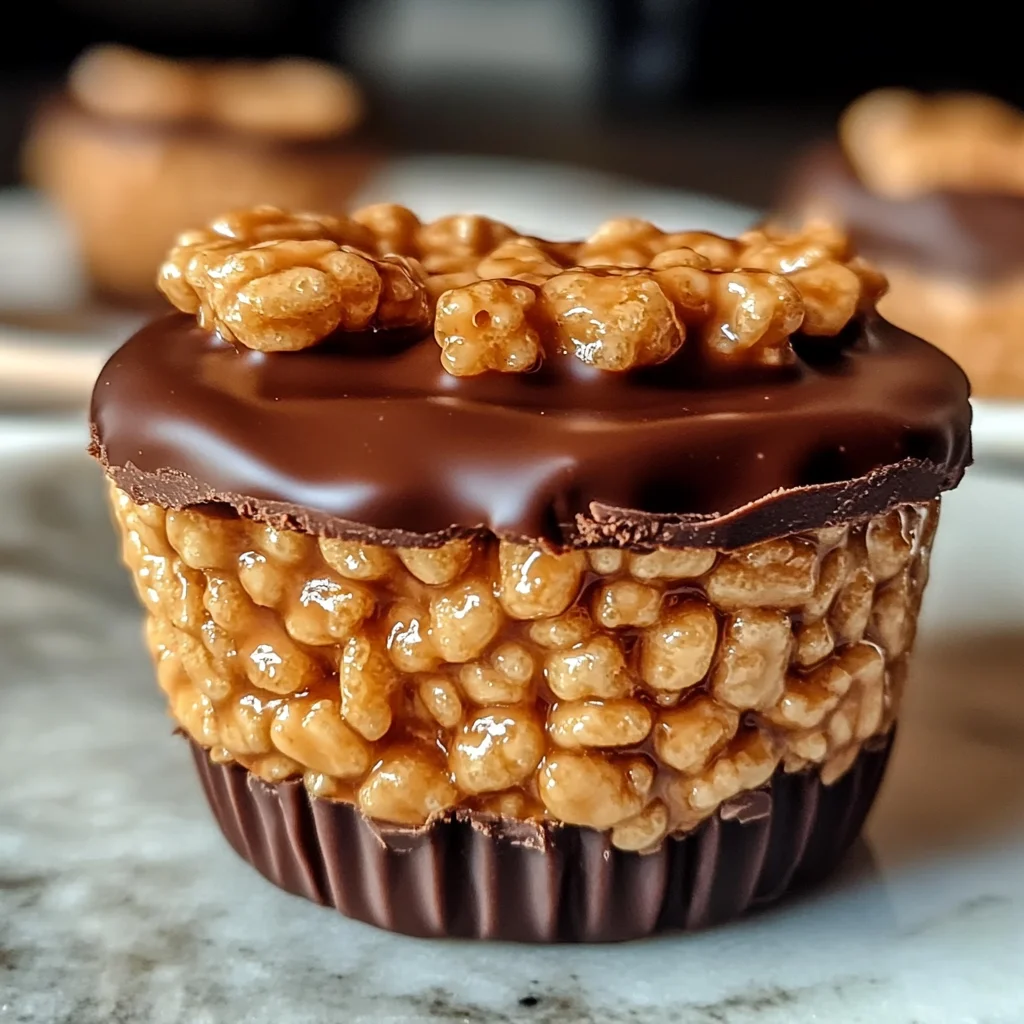
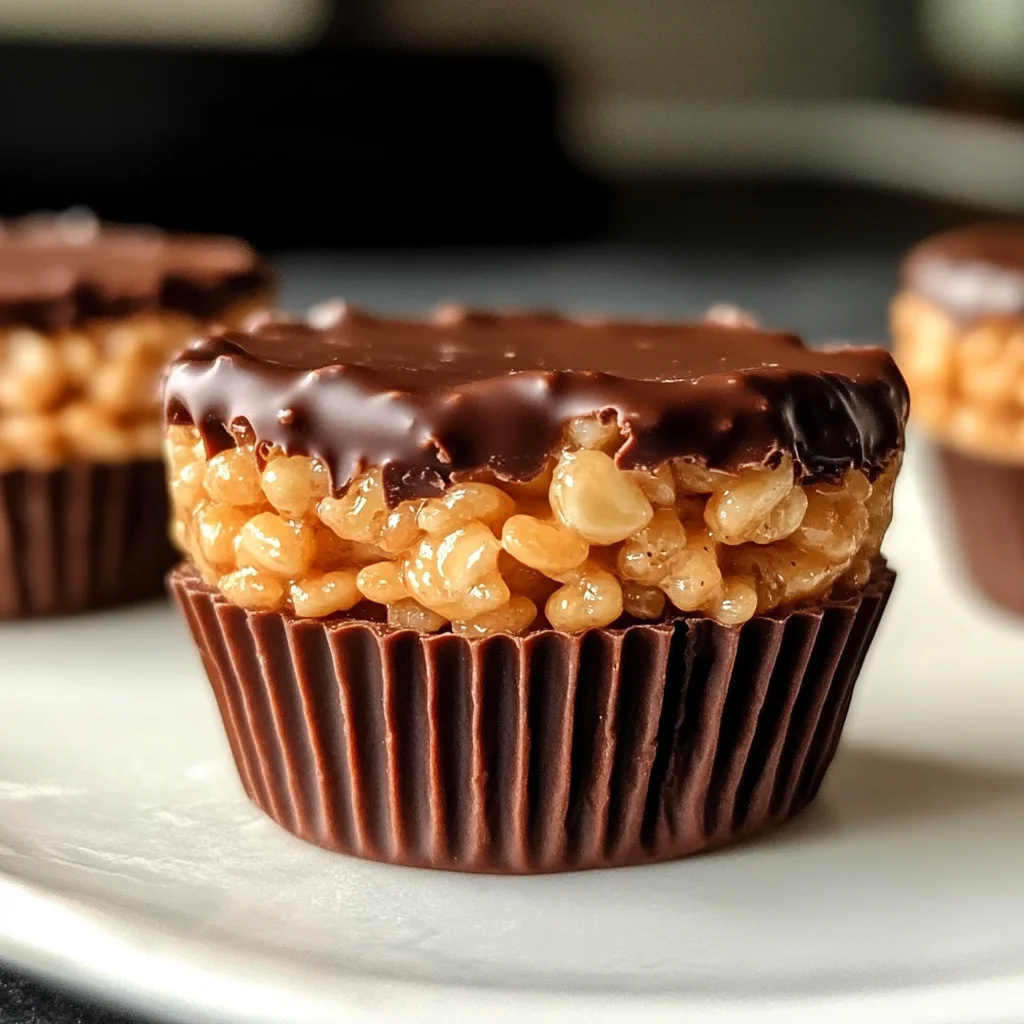
Chocolate Peanut Butter Rice Krispie Cups
If you’re looking for a quick and delightful treat that brings smiles to faces, you’ve found it! These Chocolate Peanut Butter Rice Krispie Cups are an absolute favorite in my home. The combination of creamy peanut butter, rich chocolate, and crispy Rice Krispies creates a mouthwatering snack that’s perfect for any occasion. Whether you’re prepping for a busy weeknight, hosting a family gathering, or just need a sweet pick-me-up, these cups are sure to satisfy your cravings and impress your loved ones.
What makes this recipe even more special is how easy it is to make! You don’t need to be a baking expert; just follow the simple steps and enjoy the process. Plus, they require no baking at all—just some melting and mixing! Let’s dive into why you’ll love making these delicious treats.
Why You’ll Love This Recipe
- Super simple: With just a few steps and minimal cooking involved, you’ll have these ready in no time.
- Family-friendly: Kids will love to help mix and shape the cups, making it a fun activity for everyone.
- Perfect for meal prep: Make them in advance and keep them in the fridge for an easy snack throughout the week.
- Decadent flavor: The sweet and salty combo of peanut butter and chocolate is simply irresistible!
Ingredients You’ll Need
You’ll appreciate how simple and wholesome these ingredients are. They’re easy to find and come together beautifully to create our tasty Chocolate Peanut Butter Rice Krispie Cups!
- 3 cups Rice Krispies cereal
- 1 cup creamy peanut butter
- 1/2 cup unsalted butter
- 1 cup mini vegan marshmallows
- 1 cup chocolate chips
- 1/2 tsp vanilla extract (optional)
- Pinch of sea salt (optional)
Variations
This recipe is wonderfully flexible! You can easily customize it to suit your taste or dietary preferences. Here are some fun ideas to switch things up:
- Add some crunch: Mix in chopped nuts like almonds or peanuts for an extra crunchy texture.
- Try different cereals: Swap out Rice Krispies for another crispy cereal like cornflakes or puffed rice.
- Use dark chocolate: For a richer flavor, choose dark chocolate chips instead of milk chocolate.
- Make it festive: Add colorful sprinkles on top for special occasions!
How to Make Chocolate Peanut Butter Rice Krispie Cups
Step 1: Melt the Base
Start by melting the unsalted butter and mini vegan marshmallows in a medium saucepan over low heat. Stir consistently until smooth. This step creates a gooey base that holds everything together. Make sure not to rush this process; low heat helps prevent burning.
Step 2: Add Peanut Butter
Once melted, stir in the creamy peanut butter along with the vanilla extract if you’re using it. Keep mixing until everything is well combined and creamy. The addition of peanut butter adds that beloved nutty flavor that pairs perfectly with chocolate.
Step 3: Mix with Cereal
In a large bowl, pour in your Rice Krispies cereal and then add the melted peanut butter mixture. Gently fold everything together until all the cereal is coated evenly. This ensures every bite has that delicious flavor!
Step 4: Shape the Cups
Line a muffin tin with paper liners. Spoon the mixture evenly into each cup, pressing down gently to form a flat surface on top. This helps maintain their shape when set.
Step 5: Add Chocolate Layer
Melt your chocolate chips in the microwave using short intervals (20 seconds) while stirring between each interval until smooth. Spoon the melted chocolate over each cup and spread it evenly on top. If you like, sprinkle with a pinch of sea salt for that perfect balance of sweet and salty.
Step 6: Set & Serve
Let the cups cool at room temperature for about 20 minutes or pop them in the fridge to set faster. Once firm, carefully remove them from their paper liners and serve! Enjoy these delightful treats anytime you need a little sweetness in your day!
Pro Tips for Making Chocolate Peanut Butter Rice Krispie Cups
Making these no-bake treats is a breeze, but a few simple tips can help you achieve perfection!
-
Use fresh ingredients: Ensure your peanut butter and marshmallows are fresh for the best flavor and texture. Stale ingredients can result in a less-than-delicious treat.
-
Don’t overheat the chocolate: When melting chocolate chips, heat them in short intervals and stir often to avoid burning. This will keep the chocolate smooth and glossy, perfect for topping your cups.
-
Press firmly but gently: When shaping the cups, press down firmly enough to hold their shape, but not so hard that you crush the cereal. A gentle touch will ensure that they remain crispy.
-
Chill for quicker set time: If you’re in a hurry, placing the filled muffin tin in the refrigerator will speed up the setting process. This is especially helpful if you’re eager to enjoy your delicious creations!
How to Serve Chocolate Peanut Butter Rice Krispie Cups
Presenting your Chocolate Peanut Butter Rice Krispie Cups beautifully can enhance the experience of indulging in these sweet bites. Here are some fun ideas on how to serve them:
Garnishes
- Drizzle of melted chocolate: Adding a drizzle of melted chocolate on top gives an elegant touch and extra chocolate flavor.
- Chopped nuts: Sprinkling some chopped peanuts or almonds adds a delightful crunch and complements the peanut butter perfectly.
- Cocoa powder dusting: A light dusting of cocoa powder not only enhances flavor but also makes for a stunning visual presentation.
Side Dishes
- Fresh fruit salad: A refreshing mix of seasonal fruits balances out the sweetness of the cups with natural acidity and freshness.
- Yogurt parfait: Layers of yogurt with granola and berries offer a creamy contrast that pairs wonderfully with these crunchy treats.
- Homemade smoothies: Whip up a smoothie using bananas, spinach, and almond milk for a nutritious drink that complements the flavors of your Rice Krispie cups.
- Veggies with hummus: For a savory side, serve crunchy vegetable sticks with hummus to balance out the sweetness. The creamy dip is perfect for snacking alongside your dessert!
With these tips and serving suggestions, you’ll be able to impress family and friends at any occasion. Enjoy crafting these delightful Chocolate Peanut Butter Rice Krispie Cups!
Make Ahead and Storage
These Chocolate Peanut Butter Rice Krispie Cups are perfect for meal prep! Whether you’re prepping for a party or just want to have a sweet snack on hand, these treats can be made ahead of time and stored with ease.
Storing Leftovers
- Store the cups in an airtight container at room temperature for up to 5 days.
- For optimal freshness, place parchment paper between layers if stacking them in the container.
Freezing
- Place the cups in a single layer on a baking sheet and freeze until solid (about 2 hours).
- Once frozen, transfer them to an airtight container or freezer bag, separating layers with parchment paper. They can be frozen for up to 3 months.
Reheating
- There’s no need to reheat these cups; they taste delightful straight from the fridge or at room temperature.
- If you prefer them warm, microwave for about 10 seconds, but be careful not to overheat!
FAQs
Here are some common questions about making Chocolate Peanut Butter Rice Krispie Cups!
Can I make Chocolate Peanut Butter Rice Krispie Cups without marshmallows?
Yes! You can use a vegan marshmallow alternative or simply increase the amount of peanut butter and butter to achieve a similar texture.
How do I store Chocolate Peanut Butter Rice Krispie Cups?
Store them in an airtight container at room temperature for up to 5 days or freeze them for longer storage.
Can I use other types of cereal instead of Rice Krispies?
Absolutely! Feel free to experiment with other cereals like puffed rice or cornflakes for a different texture and flavor profile.
Final Thoughts
I hope this recipe brings you as much joy as it has brought me! The combination of chocolate and peanut butter is always a crowd-pleaser, making these cups perfect for any occasion. Enjoy making your own Chocolate Peanut Butter Rice Krispie Cups, and don’t hesitate to share them with friends and family. Happy snacking!
Chocolate Peanut Butter Rice Krispie Cups
- Prep Time: 15 minutes
- Cook Time: 10 minutes
- Total Time: 25 minutes
- Yield: Makes approximately 12 cups 1x
- Category: Dessert
- Method: No-bake
- Cuisine: American
Description
Indulge in the delightful world of Chocolate Peanut Butter Rice Krispie Cups! These no-bake treats combine creamy peanut butter, rich chocolate, and crispy Rice Krispies for a snack that’s both satisfying and simple to make. Perfect for family gatherings, busy weeknights, or whenever you crave something sweet, these cups are sure to impress. With just a few easy steps and minimal ingredients, you can whip up a batch that’s not only delicious but also fun for the whole family to create together. Enjoy them as a quick pick-me-up or an irresistible dessert at your next gathering!
Ingredients
- 3 cups Rice Krispies cereal
- 1 cup creamy peanut butter
- 1/2 cup unsalted butter
- 1 cup mini vegan marshmallows
- 1 cup chocolate chips
- 1/2 tsp vanilla extract (optional)
- Pinch of sea salt (optional)
Instructions
- Melt unsalted butter and mini vegan marshmallows in a saucepan over low heat until smooth.
- Stir in creamy peanut butter and vanilla extract until combined.
- In a large bowl, mix melted mixture with Rice Krispies until evenly coated.
- Line a muffin tin with paper liners and spoon the mixture into each cup, pressing down gently.
- Melt chocolate chips in the microwave in intervals until smooth; drizzle over each cup.
- Let cool at room temperature or refrigerate until set, then serve.
Nutrition
- Serving Size: 1 cup (45g)
- Calories: 180
- Sugar: 10g
- Sodium: 80mg
- Fat: 9g
- Saturated Fat: 3g
- Unsaturated Fat: 6g
- Trans Fat: 0g
- Carbohydrates: 23g
- Fiber: 1g
- Protein: 3g
- Cholesterol: 10mg