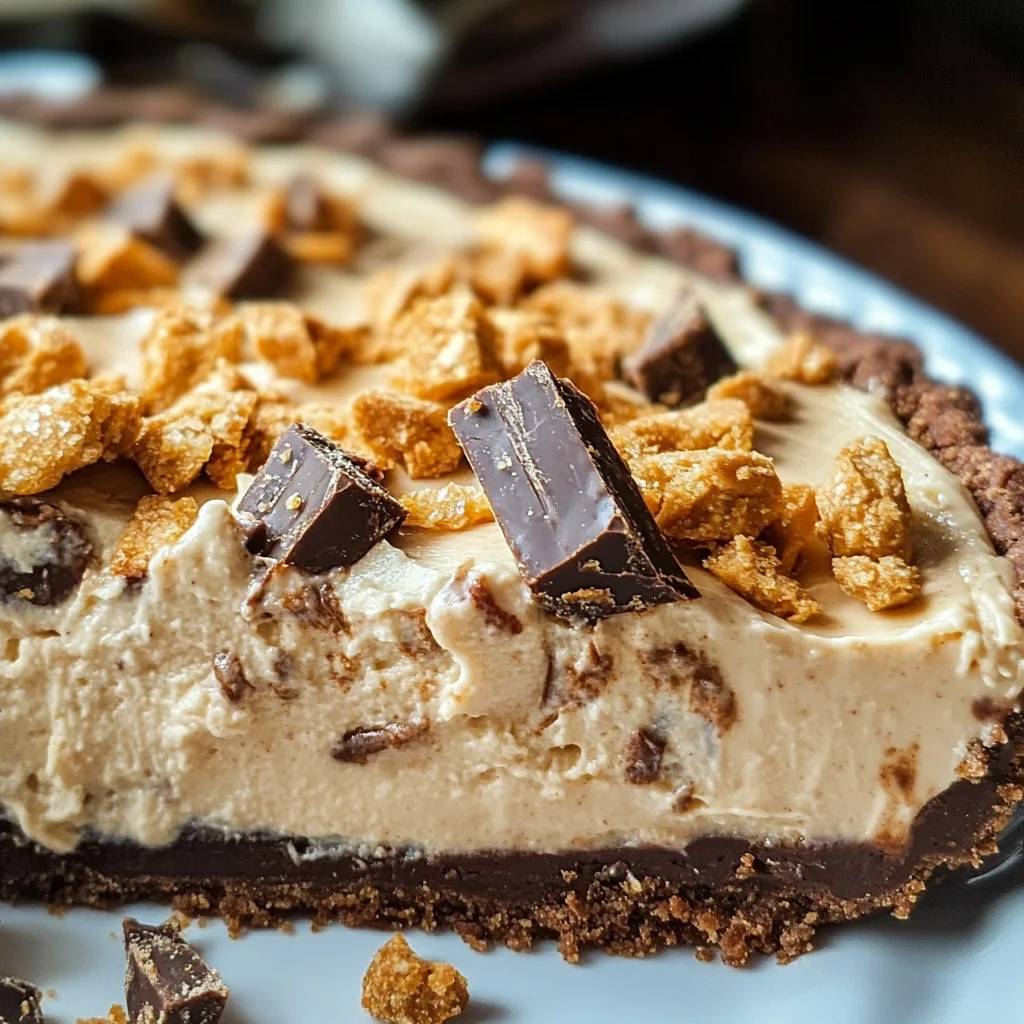
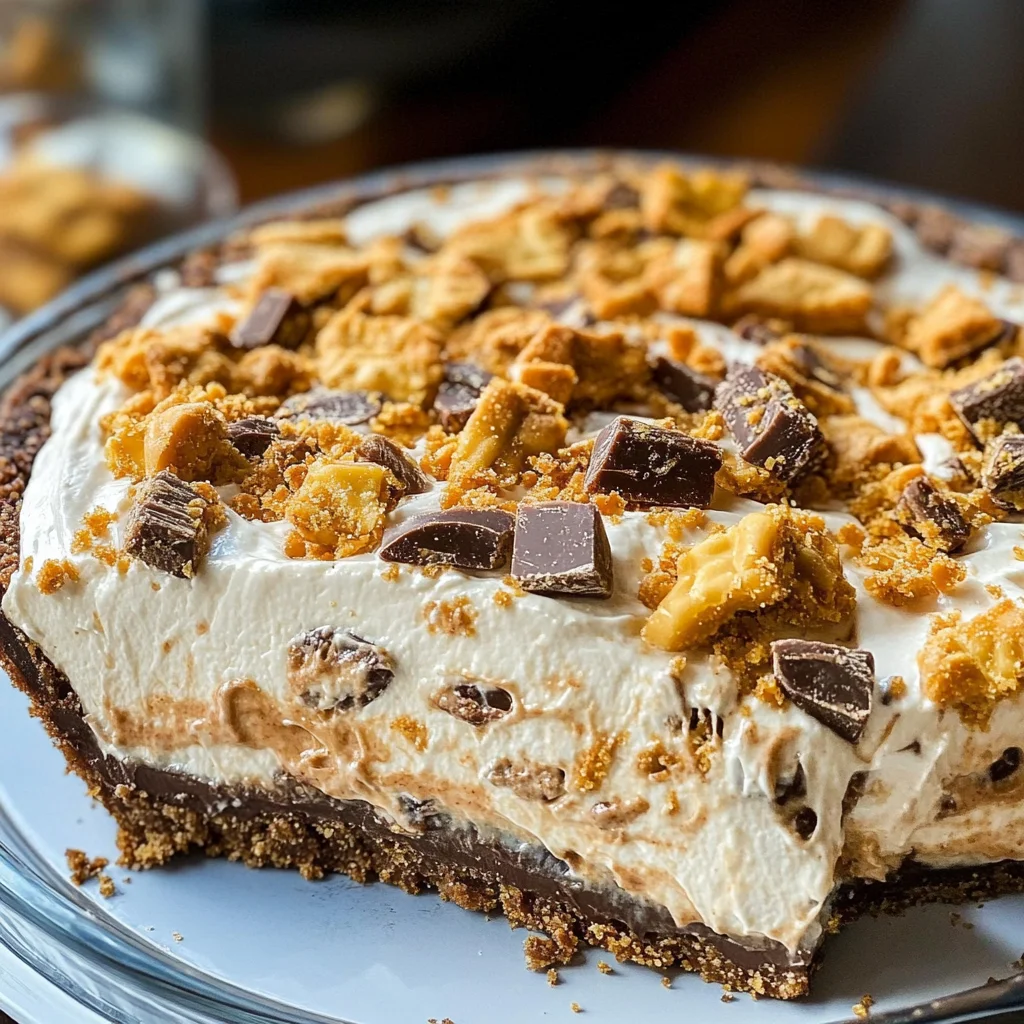
Butterfinger Pie
If you’re looking for a dessert that brings smiles and satisfies sweet cravings, look no further than this delightful Butterfinger Pie! This cool and creamy treat has become a favorite in my home—perfect for family gatherings or simply when you need a little something special during the week. It’s a no-bake wonder that not only saves time but also delivers big on flavor. Trust me, once you take your first bite, you’ll understand why this Butterfinger Pie is always a hit!
Why You’ll Love This Recipe
- Super Easy to Make: With just a few simple steps, you’ll have this pie ready to chill in no time.
- Family-Friendly Delight: Kids and adults alike adore the mix of peanut butter and chocolate flavors.
- Perfect for Any Occasion: Whether it’s a holiday gathering or a weekday treat, this pie fits right in.
- Make-Ahead Convenience: You can prepare it ahead of time, so it’s ready when you are—just pop it in the fridge!
- Decadent Flavor: The combination of creamy filling and crunchy Butterfinger pieces makes every slice irresistible.
Ingredients You’ll Need
Gathering these ingredients is half the fun! You’ll find they’re all simple, wholesome items that come together beautifully. Here’s what you’ll need for your Butterfinger Pie:
For the Filling
- 1 (8-ounce) package cream cheese (room temperature)
- 1/2 cup creamy peanut butter
- 2 teaspoons vanilla extract
- 1 1/2 cups powdered sugar
- 1 (12.5-ounce) bag fun-sized butterfinger bars (crushed; reserve 2 bars to sprinkle on top)
- 1 (8-ounce) container Cool Whip (thawed)
For the Crust
- 1 store-bought oreo or chocolate graham cracker crust
Variations
The beauty of this Butterfinger Pie recipe is its flexibility! If you want to switch things up, here are some fun ideas:
- Add Some Crunch: Mix in chopped nuts like pecans or walnuts for an extra layer of texture.
- Change Up the Topping: Try drizzling melted chocolate or caramel sauce over the top instead of crushed Butterfingers.
- Go Nut-Free: Use sunbutter instead of peanut butter for a nut-free version that still packs a punch.
- Make It Mini: Divide the filling into individual dessert cups instead of one big pie for easy serving.
How to Make Butterfinger Pie
Step 1: Prepare the Filling
Start by placing your cream cheese and peanut butter in a large mixing bowl. It’s important that your cream cheese is at room temperature; this helps create a smooth mixture. Add in the vanilla extract, then beat everything with an electric mixer until it’s nice and smooth. This step lays the foundation for your creamy filling.
Step 2: Sweeten It Up
Next, gradually beat in the powdered sugar. This will help sweeten your mixture while maintaining that lovely creamy texture. Keep mixing until there are no lumps and everything is well combined.
Step 3: Fold in Those Butterfingers
Now it’s time to add some fun! Fold in the crushed Butterfinger bars. The candy adds delightful crunch and flavor to your pie, making every bite exciting.
Step 4: Incorporate the Cool Whip
Gently fold in the thawed Cool Whip. This step adds lightness to your filling, giving it that airy quality we all love about pies. Be careful not to overmix; we want to keep that fluffy texture!
Step 5: Assemble Your Pie
Spread the filling into your store-bought oreo or chocolate graham cracker crust. Make sure it’s evenly distributed for consistent slices later. Don’t forget to sprinkle those reserved crushed Butterfingers on top—this will enhance both appearance and taste!
Step 6: Time to Chill!
Lastly, refrigerate your pie for at least 4 hours before serving. This chilling time allows all those delicious flavors to meld together beautifully, ensuring every bite is as good as it gets.
And there you have it—a delightful Butterfinger Pie that’s sure to be a winner at any gathering! Enjoy every slice!
Pro Tips for Making Butterfinger Pie
Making the perfect Butterfinger Pie is a breeze, especially with these handy tips to elevate your dessert game!
-
Use Room Temperature Ingredients: Starting with room temperature cream cheese ensures a smooth and lump-free filling. If your cream cheese is too cold, it can be challenging to blend properly.
-
Chill Your Mixing Bowl: For an even fluffier Cool Whip mixture, consider chilling your mixing bowl in the freezer for about 10 minutes before folding in the Cool Whip. This helps keep the mixture light and airy.
-
Reserve Toppings in Advance: Set aside those two reserved Butterfinger bars before you start mixing. This way, you won’t forget to sprinkle them on top for that extra crunch and visual appeal.
-
Experiment with Crusts: While an Oreo or chocolate graham cracker crust is classic, feel free to try other options like a cookie crust or even a homemade graham cracker crust for a personal touch.
-
Make Ahead of Time: This pie tastes even better after it’s had time to chill! Prepare it the night before serving, allowing the flavors to meld beautifully.
How to Serve Butterfinger Pie
Serving your Butterfinger Pie can be just as delightful as making it! Here are a few ideas to make your presentation shine.
Garnishes
- Whipped Cream: A dollop of whipped cream adds a lovely creaminess and complements the pie’s texture perfectly.
- Chocolate Drizzle: A drizzle of chocolate syrup on top can add an elegant touch and enhance the chocolate flavor.
- Chopped Peanuts: Sprinkling some chopped peanuts adds an extra crunch and ties in well with the peanut butter flavor.
Side Dishes
- Fresh Fruit Salad: A refreshing fruit salad provides a light contrast to the rich pie. Consider using seasonal fruits like strawberries, blueberries, and kiwi for vibrant colors.
- Vanilla Ice Cream: Serving a scoop of vanilla ice cream alongside the pie creates a delicious creamy combination that balances out the sweetness.
- Coffee or Tea: A warm cup of coffee or tea pairs wonderfully with this dessert, enhancing its flavors while providing a comforting finish to your meal.
- Mini Cheesecakes: Offering mini cheesecakes as an alternative dessert gives guests another tasty option that complements your Butterfinger Pie beautifully.
Now that you have all these tips and serving suggestions, you’re ready to impress everyone with your delicious Butterfinger Pie! Enjoy making it as much as you enjoy sharing it.
Make Ahead and Storage
This Butterfinger Pie is a fantastic choice for meal prep, as it can be made ahead of time and stored easily. With its creamy texture and delightful flavors, it’s sure to impress your friends and family whenever you serve it.
Storing Leftovers
- Cover the pie with plastic wrap or aluminum foil to prevent it from drying out.
- Store in the refrigerator for up to 5 days.
- If you have any remaining crushed Butterfinger bars, sprinkle them on top before serving for added crunch.
Freezing
- Slice the pie into individual servings for easy thawing later.
- Wrap each slice tightly in plastic wrap, then place in an airtight container or freezer bag.
- Freeze for up to 2 months.
Reheating
- Thaw the pie slices overnight in the fridge before serving.
- Avoid reheating in the microwave as this may alter the texture; serve chilled instead.
FAQs
If you have questions about making Butterfinger Pie, you’re not alone! Here are some common inquiries:
Can I use a different type of crust for Butterfinger Pie?
Absolutely! While an Oreo or chocolate graham cracker crust works beautifully, feel free to experiment with other cookie crusts or even a gluten-free option.
How long does Butterfinger Pie last in the fridge?
Butterfinger Pie can be stored in the refrigerator for up to 5 days. Just make sure it’s covered well to maintain its freshness!
Is Butterfinger Pie suitable for special occasions?
Yes! This no-bake dessert is perfect for birthdays, potlucks, or any gathering where you want to impress your guests with something sweet and delicious.
Can I use sugar alternatives in Butterfinger Pie?
Yes, you can substitute powdered sugar with your preferred sugar alternative. Just keep in mind that this may slightly affect the overall flavor and texture.
What are some variations I can try with Butterfinger Pie?
You can add chopped peanuts for extra crunch, mix in other candy bars, or use different flavored whipped toppings to create a unique twist on this classic recipe!
Final Thoughts
I hope you’re as excited about making this Butterfinger Pie as I am! Its creamy texture and delightful crunch make it a standout dessert that everyone will love. Whether you’re preparing it for a special occasion or just because you deserve a treat, this recipe is sure to bring smiles all around. Happy baking, and enjoy every delicious bite!
Butterfinger Pie
- Prep Time: 15 minutes
- Cook Time: N/A
- Total Time: 0 hours
- Yield: Serves 8
- Category: Dessert
- Method: No-Bake
- Cuisine: American
Description
Indulge in the creamy delight of this Butterfinger Pie, a no-bake dessert that is sure to please both kids and adults alike. With its luscious peanut butter filling and crunchy Butterfinger pieces, this pie is not only simple to make but also perfect for any occasion—from family gatherings to casual weeknight treats. The combination of rich flavors and textures will leave everyone wanting more. Plus, you can prepare it ahead of time for added convenience! Enjoy this sweet treat chilled, and watch as it becomes a new favorite in your home.
Ingredients
- 1 (8-ounce) package cream cheese, room temperature
- 1/2 cup creamy peanut butter
- 2 teaspoons vanilla extract
- 1 1/2 cups powdered sugar
- 1 (12.5-ounce) bag fun-sized Butterfinger bars, crushed (reserve 2 bars for topping)
- 1 (8-ounce) container Cool Whip, thawed
- 1 store-bought Oreo or chocolate graham cracker crust
Instructions
- In a mixing bowl, blend cream cheese and peanut butter until smooth. Add vanilla extract and mix well.
- Gradually incorporate powdered sugar until fully combined.
- Gently fold in the crushed Butterfinger bars.
- Carefully mix in the thawed Cool Whip until just combined.
- Spread the filling into the prepared crust evenly, then sprinkle reserved Butterfinger pieces on top.
- Refrigerate for at least 4 hours before serving.
Nutrition
- Serving Size: 1 slice (114g)
- Calories: 308
- Sugar: 25g
- Sodium: 160mg
- Fat: 18g
- Saturated Fat: 7g
- Unsaturated Fat: 10g
- Trans Fat: 0g
- Carbohydrates: 32g
- Fiber: 1g
- Protein: 5g
- Cholesterol: 25mg