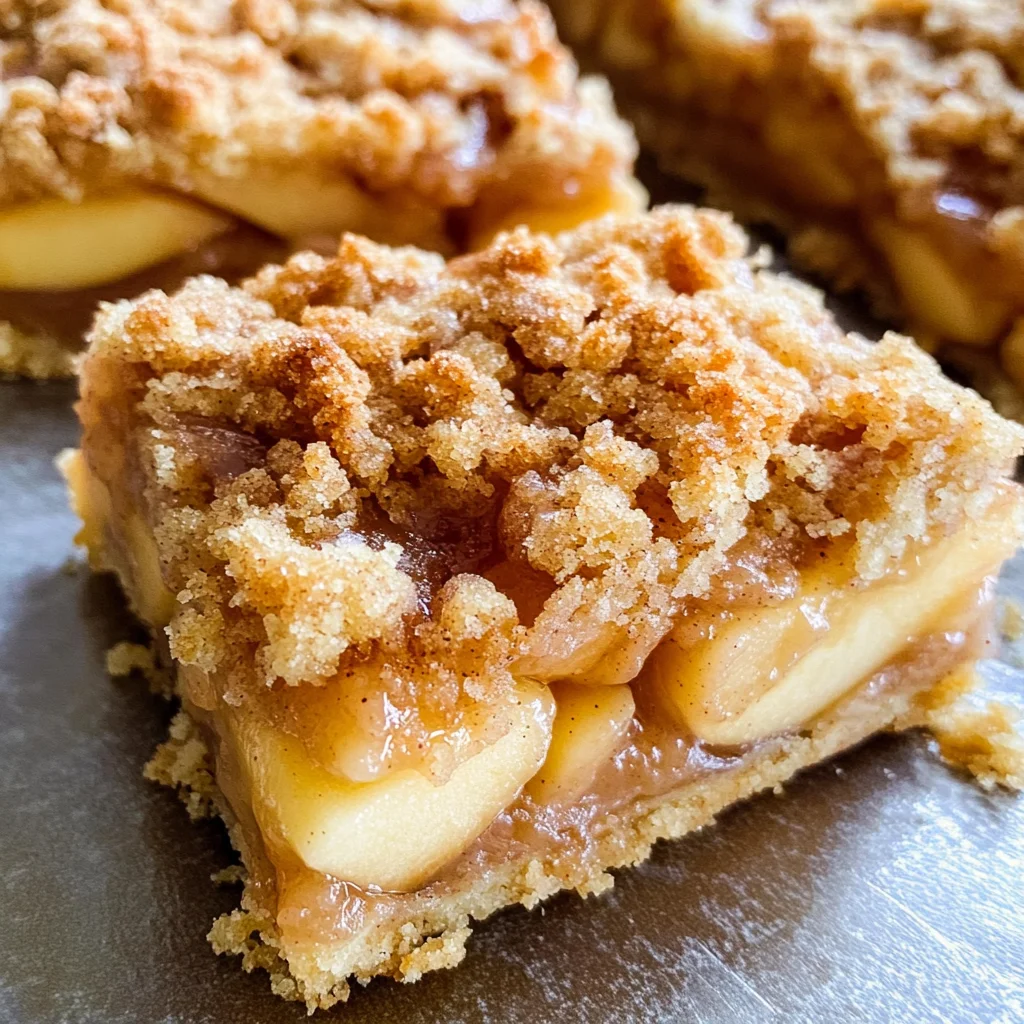
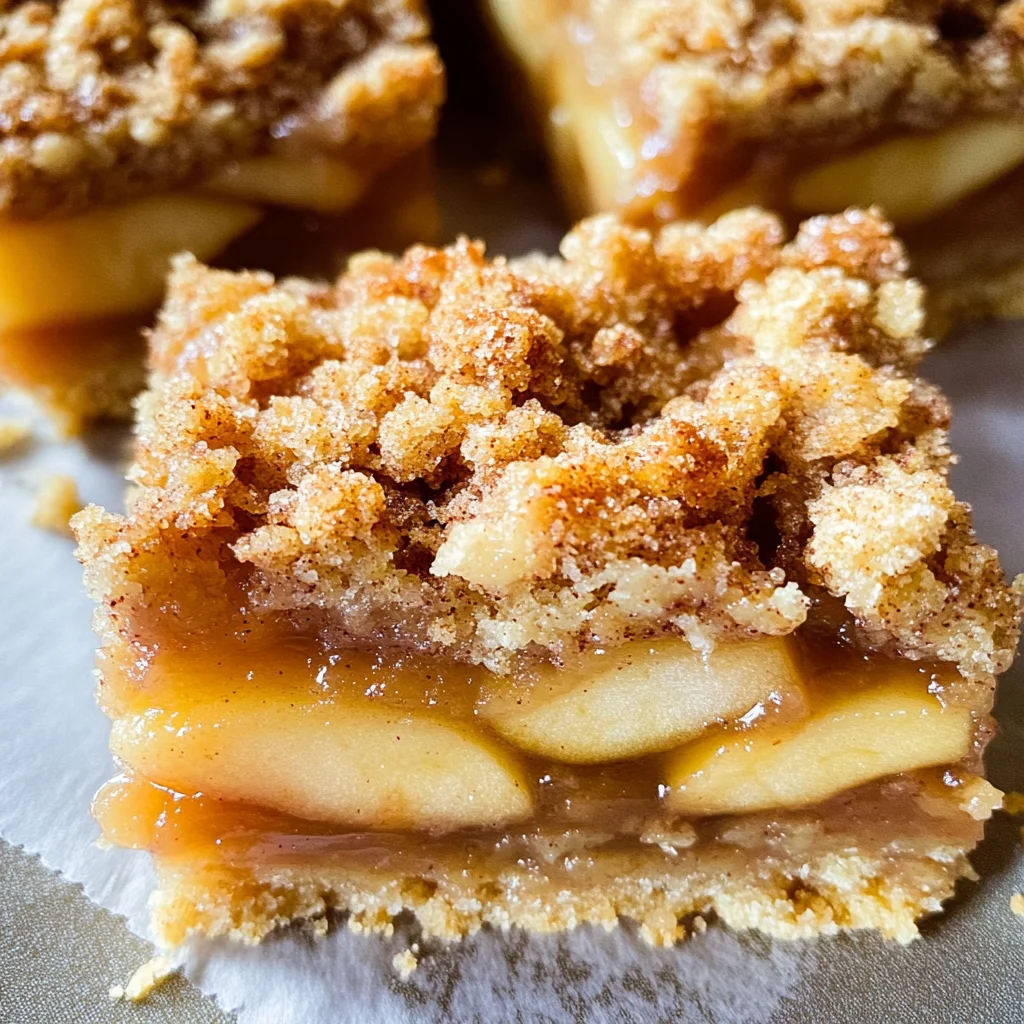
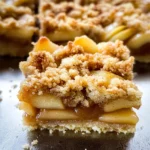
Apple Pie Bars
If you’re looking for a dessert that brings comfort and joy, you’ve come to the right place! These Apple Pie Bars are a delightful twist on the classic apple pie. They combine a buttery shortbread crust with sweet, tender apples and a crumbly streusel topping that makes every bite feel like a warm hug. Perfect for busy weeknights or family gatherings, these bars are easy to prepare and sure to impress everyone at your table.
What I love most about these Apple Pie Bars is how they evoke memories of cozy autumn days spent baking with loved ones. You can whip them up quickly, making them an ideal treat for any occasion. Plus, they can easily be made ahead of time, so you’ll always have something delicious on hand!
Why You’ll Love This Recipe
- Quick and Easy: With just 15 minutes of prep time, you can have these bars in the oven before you know it.
- Family-Friendly: Everyone loves apple pie! These bars are perfect for kids and adults alike.
- Make-Ahead Convenience: Bake a batch on the weekend, and enjoy them all week long as a sweet snack or dessert.
- Delicious Flavor: The combination of cinnamon-spiced apples and buttery crumble is simply irresistible.
- Perfect for Any Occasion: Whether it’s a potluck or a cozy night in, these bars fit right in.
Ingredients You’ll Need
Making these Apple Pie Bars requires only simple, wholesome ingredients that you probably already have on hand. Let’s gather everything we need to create this delightful treat!
For the Apple Filling
- 8 cups apples, peeled and thinly sliced
- 1/2 cup granulated sugar
- 3 tbsp. all-purpose flour
- 1 tsp. cinnamon
For the Crust and Topping
- 3/4 cup butter, softened at room temperature
- 1/2 cup granulated sugar
- 2 cups all-purpose flour
- 1/2 tsp. cinnamon
- Pinch salt
- 3/4 cup rolled oats (quick oats)
- 3/4 cup brown sugar, packed
- 1/2 cup all-purpose flour
- 1/2 tsp. cinnamon
- 1/2 cup cold butter, cubed
Variations
This recipe is wonderfully flexible, so feel free to get creative! Here are some fun variations to try:
- Add nuts: Toss in some chopped walnuts or pecans for an added crunch.
- Change up the fruit: Mix in some sliced pears or cranberries for a different flavor profile.
- Make it gluten-free: Substitute regular flour with a gluten-free blend to accommodate dietary needs.
- Spice it up: Add nutmeg or ginger along with the cinnamon for an extra layer of warmth.
How to Make Apple Pie Bars
Step 1: Prepare the Baking Dish
Start by lining your 9×13-inch baking pan with parchment paper or lightly greasing it with butter. This step is key for easy removal once your Apple Pie Bars are baked—nobody wants to lose those delicious edges!
Step 2: Make the Crust
In a large mixing bowl, beat together softened butter and granulated sugar until light and fluffy. This creates a rich base that holds everything together beautifully. In another small bowl, mix together all-purpose flour, cinnamon, and salt before gradually folding this into your butter mixture.
Step 3: Bake the Crust
Transfer the crust mixture into your prepared baking dish. Spread it out evenly and press down firmly—this ensures that it holds its shape while baking. Pop it into a preheated oven at 350°F for about 15 minutes until it’s just set.
Step 4: Prepare the Apple Filling
While your crust is baking, combine sliced apples with granulated sugar, all-purpose flour, and cinnamon in a bowl. This mixture will be sweetened perfectly by the sugar while the flour helps thicken any juices released during baking.
Step 5: Make the Streusel Topping
In another bowl, mix quick oats, brown sugar, all-purpose flour, and cinnamon before cutting in cold cubed butter using your hands or a pastry blender until it resembles coarse crumbs. This topping adds both texture and flavor—don’t skip this step!
Step 6: Assemble Your Bars
Once your crust has cooled slightly, spread the apple mixture evenly over it. Then sprinkle the streusel topping generously over the apples and press down lightly to ensure it sticks together during baking.
Step 7: Bake Until Golden Brown
Return everything to your preheated oven at 350°F for about 45 minutes until golden brown and bubbly. The aroma will be heavenly as they bake!
Step 8: Cool and Slice
Let your Apple Pie Bars cool completely before cutting them into squares. This helps them hold their shape when serving—you want those beautiful layers to shine through!
These Apple Pie Bars are sure to become a favorite in your home just like they are in mine! Enjoy every delicious bite!
Pro Tips for Making Apple Pie Bars
Making Apple Pie Bars is a delightful experience, and these tips will ensure you achieve the best results every time!
-
Choose the right apples: Using a mix of tart and sweet apples, like Granny Smith and Honeycrisp, adds depth to the flavor and balances sweetness.
-
Don’t skip the resting time: Allowing the crust to cool slightly before adding the apple filling helps maintain structure and avoids a soggy base.
-
Make it your own: Feel free to experiment with spices! Adding nutmeg or allspice can give your bars an extra layer of warmth and flavor.
-
Use fresh ingredients: Fresh apples and high-quality butter can make a significant difference in taste. Take the time to select the best ingredients for maximum flavor.
-
Store properly: To keep your Apple Pie Bars fresh longer, store them in an airtight container at room temperature for up to three days or refrigerate for up to a week.
How to Serve Apple Pie Bars
These delightful Apple Pie Bars are perfect for any occasion, whether it’s a family gathering or a cozy night in. Here are some simple ideas on how to present them beautifully!
Garnishes
- Powdered sugar: A light dusting of powdered sugar on top adds a touch of elegance and sweetness.
- Vanilla ice cream: Serving with a scoop of vanilla ice cream creates a comforting contrast between warm bars and cold ice cream.
- Whipped coconut cream: For a dairy-free option, whipped coconut cream adds creaminess that complements the flavors perfectly.
Side Dishes
- Vanilla ice cream: This classic pairing enhances the warmth of the bars while adding creamy sweetness.
- Fresh fruit salad: A refreshing side that brightens up your plate, featuring seasonal fruits would balance out the richness of the bars.
- Coffee or tea: Serving your Apple Pie Bars with a warm beverage like coffee or herbal tea makes for a perfect afternoon treat.
- Cheese platter: A selection of mild cheeses can create an interesting contrast with the sweet flavors, making it a great addition to a dessert table.
With these serving suggestions in mind, you’re ready to enjoy your delicious Apple Pie Bars in style!
Make Ahead and Storage
These Apple Pie Bars are perfect for meal prep! You can easily make a batch ahead of time and enjoy them throughout the week, making them a convenient dessert option.
Storing Leftovers
- Store leftover Apple Pie Bars in an airtight container at room temperature for up to 3 days.
- For longer freshness, refrigerate them where they can last for up to a week.
Freezing
- Allow the bars to cool completely before freezing.
- Wrap individual bars tightly in plastic wrap, then place them in a freezer-safe container or bag.
- They can be frozen for up to 3 months. Just make sure to label the container with the date!
Reheating
- To reheat, simply thaw the bars at room temperature for a few hours.
- For a warm treat, you can microwave each bar for about 10-15 seconds or warm them in an oven preheated to 350°F until heated through.
FAQs
Here are some common questions about making Apple Pie Bars that might help you out!
Can I use different types of apples for Apple Pie Bars?
Absolutely! While Granny Smith apples are great for their tartness, you can mix and match with sweeter varieties like Honeycrisp or Fuji for added flavor.
How do I ensure my Apple Pie Bars have a nice crumbly topping?
To get that perfect crumbly streusel topping, make sure your butter is cold when cutting it into the dry ingredients. This helps create those lovely textures!
Can I make Apple Pie Bars gluten-free?
Yes! You can substitute all-purpose flour with a gluten-free blend. Just ensure that other ingredients are also certified gluten-free.
How long do Apple Pie Bars last?
If stored properly at room temperature, they will last about 3 days. In the fridge, they can last up to a week!
Are Apple Pie Bars suitable for meal prep?
Definitely! These bars not only store well but also freeze beautifully, making them a fantastic option for meal prep or as a sweet snack throughout the week.
Final Thoughts
I hope you find joy in creating these delightful Apple Pie Bars! With their buttery shortbread crust and sweet apple filling topped with a crunchy streusel, they’re truly comfort food at its best. Whether you’re serving them at a gathering or enjoying them as an after-dinner treat, these bars are sure to bring smiles. Enjoy every bite and happy baking!
Apple Pie Bars
- Prep Time: 15 minutes
- Cook Time: 60 minutes
- Total Time: 1 hour 15 minutes
- Yield: Approximately 12 servings 1x
- Category: Dessert
- Method: Baking
- Cuisine: American
Description
Indulge in the delightful flavors of homemade Apple Pie Bars, a perfect treat that combines a buttery shortbread crust with tender spiced apples and a crunchy streusel topping. These bars evoke the warmth of autumn and are great for family gatherings or quiet evenings at home. With their enticing aroma and comforting taste, they’re sure to impress anyone who takes a bite. Quick and easy to prepare, these Apple Pie Bars can be made ahead of time, ensuring you always have a delicious dessert on hand for any occasion.
Ingredients
- 8 cups apples, peeled and thinly sliced
- 1/2 cup granulated sugar
- 3 tbsp all-purpose flour
- 1 tsp cinnamon
- 3/4 cup butter, softened
- 2 1/2 cups all-purpose flour (for crust and topping)
- 3/4 cup rolled oats
- 3/4 cup brown sugar, packed
- Pinch of salt
Instructions
- Preheat your oven to 350°F (175°C). Line a 9×13-inch baking pan with parchment paper.
- In a mixing bowl, cream together softened butter and granulated sugar until fluffy. Gradually add flour, cinnamon, and salt.
- Press the crust mixture into the prepared pan evenly and bake for about 15 minutes until just set.
- Meanwhile, mix sliced apples with granulated sugar, flour, and cinnamon in another bowl.
- For the streusel topping, combine oats, brown sugar, flour, cinnamon, and cold cubed butter until crumbly.
- Once the crust is slightly cooled, spread the apple mixture over it and sprinkle with streusel topping.
- Bake for an additional 45 minutes until golden brown and bubbly.
- Allow to cool completely before slicing into bars.
Nutrition
- Serving Size: 1 bar (approx. 75g)
- Calories: 210
- Sugar: 12g
- Sodium: 95mg
- Fat: 9g
- Saturated Fat: 5g
- Unsaturated Fat: 3g
- Trans Fat: 0g
- Carbohydrates: 32g
- Fiber: 2g
- Protein: 2g
- Cholesterol: 20mg