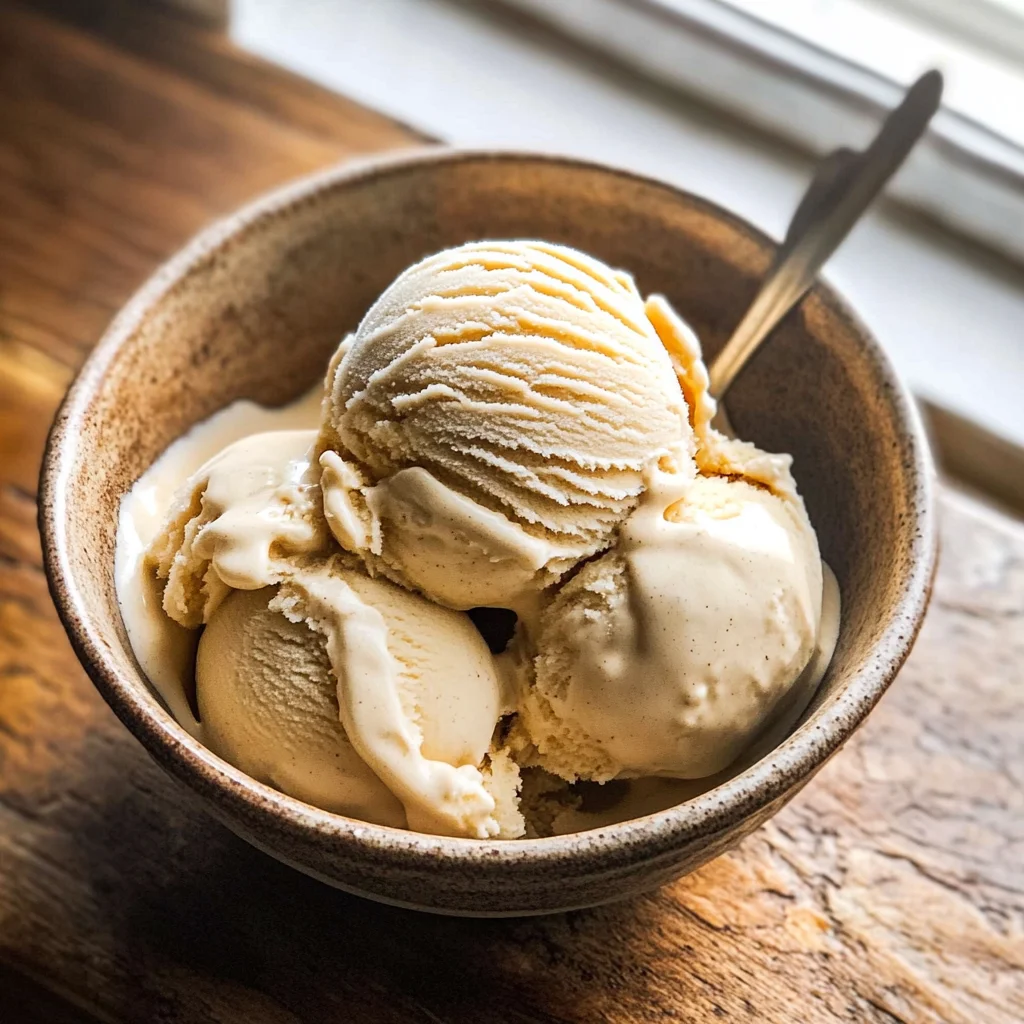
Homemade Maple Ice Cream
If you’re looking for a delightful treat that captures the essence of comfort and nostalgia, then my Homemade Maple Ice Cream is just what you need. This ice cream is not only creamy and rich but also has a light maple flavor that makes it perfect for any occasion. Whether it’s a busy weeknight or a family gathering, this recipe brings smiles to faces and warmth to hearts.
What I love most about this ice cream is how it complements so many desserts—especially apple crisp! Just picture it: warm apple crisp topped with a scoop of cold, sweet maple ice cream. It’s the kind of dessert that makes you feel cozy inside, no matter the weather outside.
Why You’ll Love This Recipe
- Easy to make: With just a few simple steps, you can whip up this delicious ice cream in no time.
- Family favorite: Kids and adults alike will adore the sweet maple flavor; it’s sure to be a hit!
- Make-ahead convenience: Prepare your ice cream ahead of time and store it for whenever the craving strikes.
- Versatile pairing: Enjoy this creamy delight with pies, cakes, or even on its own!
Ingredients You’ll Need
Let’s gather some simple, wholesome ingredients to create this delightful Homemade Maple Ice Cream. You probably have most of these items in your pantry already!
For the Ice Cream Base
- 6 egg yolks
- 3/4 cup maple syrup (Grade B, see notes)
- 1 tsp arrowroot (or tapioca starch, or cornstarch)
- 1/4 tsp sea salt
- 1 1/2 cups half and half
- 1 1/2 cups heavy cream
- 1 tsp vanilla extract
Variations
One of the things I love about this recipe is its flexibility! Feel free to get creative and make it your own with these fun variations:
- Add chocolate chips: Stir in mini chocolate chips for a sweet surprise in every bite.
- Mix in nuts: Chopped pecans or walnuts add a lovely crunch and enhance the maple flavor.
- Spice it up: A pinch of cinnamon or nutmeg can bring warm spices into the mix for added depth.
- Fruit infusion: Blend in some pureed strawberries or blueberries for a fruity twist!
How to Make Homemade Maple Ice Cream
Step 1: Combine Egg Mixture
Whisk together the egg yolks, maple syrup, arrowroot, and sea salt until everything is fully combined. This step is essential because it creates a rich base for your ice cream. The egg yolks help achieve that silky smooth texture we all crave!
Step 2: Heat the Mixture
Now, whisk in the half and half while cooking over medium-high heat. Keep whisking constantly until it begins to thicken but doesn’t come to a boil. This gentle cooking process allows the flavors to meld beautifully while ensuring our mixture doesn’t scramble.
Step 3: Add Cream and Vanilla
Once your mixture has thickened nicely, remove it from the heat right away. Whisk in the heavy cream and vanilla extract. This addition adds richness and sweetness, making your ice cream so luscious!
Step 4: Strain and Chill
Pour your custard through a strainer into another bowl to catch any stray bits—it keeps your ice cream super smooth. Then chill your mixture in the refrigerator for at least 4 hours (or overnight if you can wait!). Chilling helps develop flavor while also ensuring it’s nice and cold when you churn it.
Step 5: Churn It Up!
Follow your ice cream maker’s instructions to freeze the mixture. It’s ready when it stands up on a spoon—how exciting!
Step 6: Freeze Until Firm
After churning, transfer your homemade maple ice cream into an airtight container. Place it in the freezer for 4-6 hours to let it firm up completely. This final freezing stage will give you that perfect scoopable texture!
And there you have it! Your very own Homemade Maple Ice Cream ready to be enjoyed any time you like!
Pro Tips for Making Homemade Maple Ice Cream
Making ice cream at home can be a delightful experience, and these tips will help you create the creamiest, most delicious maple ice cream possible!
-
Use Grade B Maple Syrup: This type of syrup has a richer flavor, which enhances the overall taste of your ice cream. It brings a deeper maple essence that’s perfect for this dessert.
-
Chill Your Mixture: Always allow the custard to chill in the refrigerator for at least 4 hours before churning. This step not only enhances the flavor but also helps the ice cream achieve that perfect creamy texture.
-
Whisk Constantly While Cooking: Keeping your mixture moving prevents it from sticking to the bottom of the pan and ensures an even heat distribution. This is crucial for achieving a smooth and creamy consistency without any lumps.
-
Strain Before Freezing: Pouring your mixture through a strainer removes any stray bits of cooked egg or starch that could interfere with the silkiness of your final product. This tip guarantees the smoothest texture possible.
-
Let it Firm Up: After churning, it’s important to freeze your ice cream for several hours to allow it to firm up properly. This step ensures you won’t end up with a soft scoop when you’re ready to serve!
How to Serve Homemade Maple Ice Cream
Serving homemade maple ice cream is all about presentation and pairing it with complementary flavors. Here are some ideas to make your dessert truly special!
Garnishes
- Chopped Nuts: Toasted pecans or walnuts add a delightful crunch and complement the maple flavor beautifully.
- Fresh Berries: A handful of strawberries or blueberries can brighten up your dish with both color and freshness, creating a lovely contrast to the creamy ice cream.
Side Dishes
- Apple Crisp: The warm spices and sweet apples in this classic dessert pair wonderfully with cold maple ice cream, creating a comforting combination.
- Brownies: Rich, fudgy brownies provide a decadent base that enhances the smoothness of the maple ice cream, making every bite irresistible.
- Pancakes: Serve your maple ice cream alongside warm pancakes for a playful breakfast twist that’s perfect any time of day.
- Grilled Peaches: The caramelized sweetness of grilled peaches pairs beautifully with maple ice cream, offering a delightful summer treat that’s both light and satisfying.
With these tips and serving suggestions, you’ll create an irresistible homemade maple ice cream experience that friends and family will love! Enjoy every creamy bite!
Make Ahead and Storage
This Homemade Maple Ice Cream is perfect for meal prep! You can make it ahead of time and have a delightful treat ready whenever you need it. Here’s how to store it properly to maintain its creamy texture and flavor.
Storing Leftovers
- Store any leftover ice cream in an airtight container.
- Press a piece of parchment paper directly onto the surface of the ice cream before sealing for added freshness.
- Keep in the freezer for up to 2 weeks for the best flavor and texture.
Freezing
- For optimal freezing, transfer the ice cream to a container that’s not too large, allowing for minimal air exposure.
- Ensure your freezer is set to 0°F (-18°C) or lower for consistent freezing.
- Allow the ice cream to freeze completely for at least 4–6 hours after churning.
Reheating
- This recipe does not require reheating, but you can allow it to sit at room temperature for about 5-10 minutes before serving to soften slightly.
- If you notice any ice crystals forming, simply stir gently with a spatula before serving.
FAQs
Here are some commonly asked questions about this delicious Homemade Maple Ice Cream!
Can I use different types of maple syrup for Homemade Maple Ice Cream?
Yes! While Grade B is preferred for its robust flavor, you can use other grades like Grade A. Just keep in mind that the flavor may vary slightly.
How long does Homemade Maple Ice Cream last in the freezer?
Homemade Maple Ice Cream can last in the freezer for up to 2 weeks when stored properly, but it’s best enjoyed fresh!
Is it necessary to chill the custard before churning?
Absolutely! Chilling the custard helps improve the texture and allows it to churn into that creamy goodness we all love.
Final Thoughts
I hope this Homemade Maple Ice Cream recipe brings as much joy to your kitchen as it has to mine. There’s nothing quite like indulging in a scoop of creamy, sweet goodness on a warm day or alongside your favorite dessert. Don’t hesitate to invite family and friends over for a taste – they’ll surely be impressed! Enjoy making this special treat, and may every bite be filled with happiness!
Homemade Maple Ice Cream
- Prep Time: 15 minutes
- Cook Time: 10 minutes
- Total Time: 25 minutes
- Yield: Approximately 6 servings 1x
- Category: Dessert
- Method: Churning
- Cuisine: American
Description
Indulge in the creamy delight of Homemade Maple Ice Cream, a treat that perfectly balances sweetness and nostalgia. This ice cream is rich, velvety, and infused with the warm flavor of pure maple syrup, making it ideal for any occasion—from casual weeknight desserts to festive family gatherings. Picture a scoop of this luscious ice cream atop warm apple crisp or served alongside decadent brownies—it’s sure to bring smiles all around.
Ingredients
- 6 egg yolks
- 3/4 cup maple syrup (Grade B)
- 1 tsp arrowroot (or tapioca starch)
- 1/4 tsp sea salt
- 1 1/2 cups half and half
- 1 1/2 cups heavy cream
- 1 tsp vanilla extract
Instructions
- In a bowl, whisk together egg yolks, maple syrup, arrowroot, and sea salt until combined.
- Heat the mixture in a saucepan over medium-high heat while whisking in half and half until it thickens without boiling.
- Remove from heat; whisk in heavy cream and vanilla extract for added richness.
- Strain the mixture into another bowl to ensure smoothness; chill in the refrigerator for at least 4 hours.
- Churn the chilled mixture according to your ice cream maker's instructions until it holds its shape.
- Transfer to an airtight container and freeze for 4-6 hours until firm.
Nutrition
- Serving Size: 1/2 cup (120g)
- Calories: 350
- Sugar: 30g
- Sodium: 50mg
- Fat: 24g
- Saturated Fat: 14g
- Unsaturated Fat: 9g
- Trans Fat: 0g
- Carbohydrates: 32g
- Fiber: 0g
- Protein: 4g
- Cholesterol: 185mg